Quick Answer
Good plans for a patio start with the site, not the sketch. Measure how you’ll use the space, check drainage, slope, access, utilities, and local California water and structural requirements, then match the layout and materials to those conditions. For design inspiration before you build, review these patio ideas for 2026.
You’re probably looking at a backyard that has potential but doesn’t work the way you want it to. Maybe the yard is too exposed, too sloped, too cramped near the back door, or just unfinished.
That’s where plans for a patio matter. A patio that looks good on paper can still fail in the field if the layout ignores drainage, soil movement, access, or California water rules. In Monterey County, the right plan starts with the property you have, then builds around how you’ll use it.
Introduction
Most homeowners start with shape and material. That’s understandable, but it’s backwards. The first job is figuring out where the patio can succeed without creating drainage problems, awkward traffic flow, or a layout that feels oversized for the house.
A workable patio plan ties together use, location, construction method, and code issues early. Once those pieces are settled, the design decisions become much easier.
Assessing Your Property for a New Patio
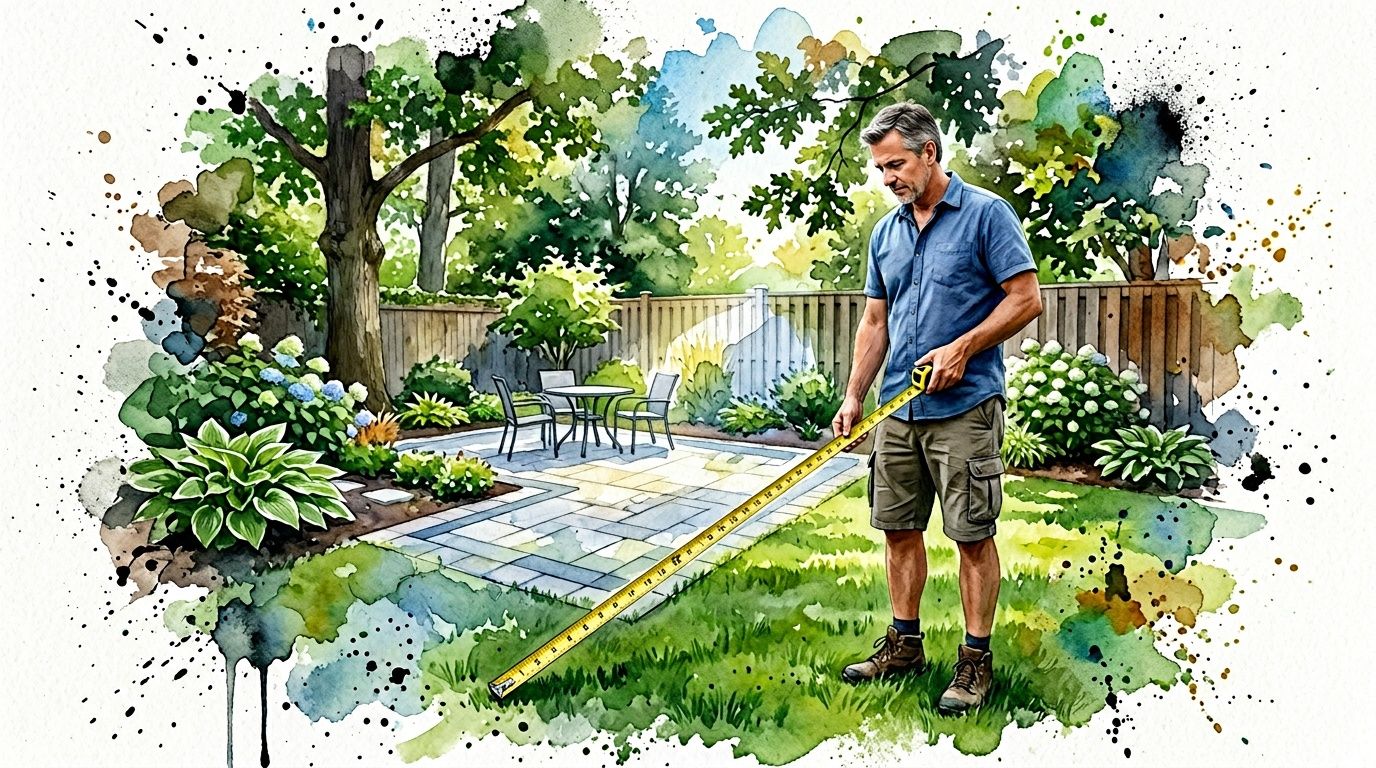
The first site visit tells you more than any inspiration photo. Before talking about pavers, concrete, or furniture, walk the yard at different times of day and pay attention to where people already move, where water sits, and where the grade starts to fight you.
Start with access, sun, and privacy
A patio that’s hard to reach won’t get used much. In most yards, the strongest location is where the patio connects naturally to the house, usually near a kitchen, family room, or primary outdoor access point.
Sun and wind matter just as much. A patio that feels pleasant at noon can be miserable in the late afternoon if it has no shade and reflects heat off surrounding walls. Along the Central Coast, marine air and shifting sun patterns can make one side of the yard much more comfortable than another.
Privacy is another point people miss early. If the best flat spot in the yard puts your dining table directly in line with a neighbor’s second-story window, the layout needs adjustment. Sometimes that means rotating the patio. Sometimes it means pairing the hardscape with planting, screening, or a retaining feature.
Practical rule: The best patio location isn’t always the biggest open area. It’s the part of the yard that gives you easy access, usable light, and enough privacy to stay outside longer.
Check slope, utilities, and irrigation before design
Planning requires practical considerations. If the yard is sloped, narrow, wedge-shaped, or uneven, don’t force a standard rectangle into it. Terracing, curved edges, and split-level layouts usually perform better in awkward yards than trying to flatten everything into one large slab.
If your yard drops off, erosion control may need to be addressed before the patio goes in. That’s one reason slope work and hardscape planning often overlap with broader outdoor design decisions, especially on the Central Coast. If that’s your situation, it helps to review erosion control options for sloped yards while the patio layout is still being developed.
A proper site check should also identify:
- Underground lines: Utility locations need to be confirmed before excavation starts.
- Existing irrigation: Sprinkler lines, valves, and drip zones often run right through the future patio area.
- Drainage patterns: Water should never be pushed toward the house or trapped at door thresholds.
- Tree roots: Mature trees can affect grading, excavation depth, and future surface movement.
Decide what the yard can support
Not every yard should have the same type of patio. A flat rear lot with open access can handle a broad entertainment space. A narrow side yard may be better as a smaller dining court or transition zone. A sloped backyard may need retaining walls and level changes before the surface material is even discussed.
The point is simple. The property sets the limits. Good plans work with those limits instead of pretending they don’t exist.
Designing a Patio Layout for Your Lifestyle
A common Monterey County mistake looks like this. The slab is poured, the table goes in, the grill gets added, and everyone realizes the back door, chair pull-out, and path to the yard all fight each other.
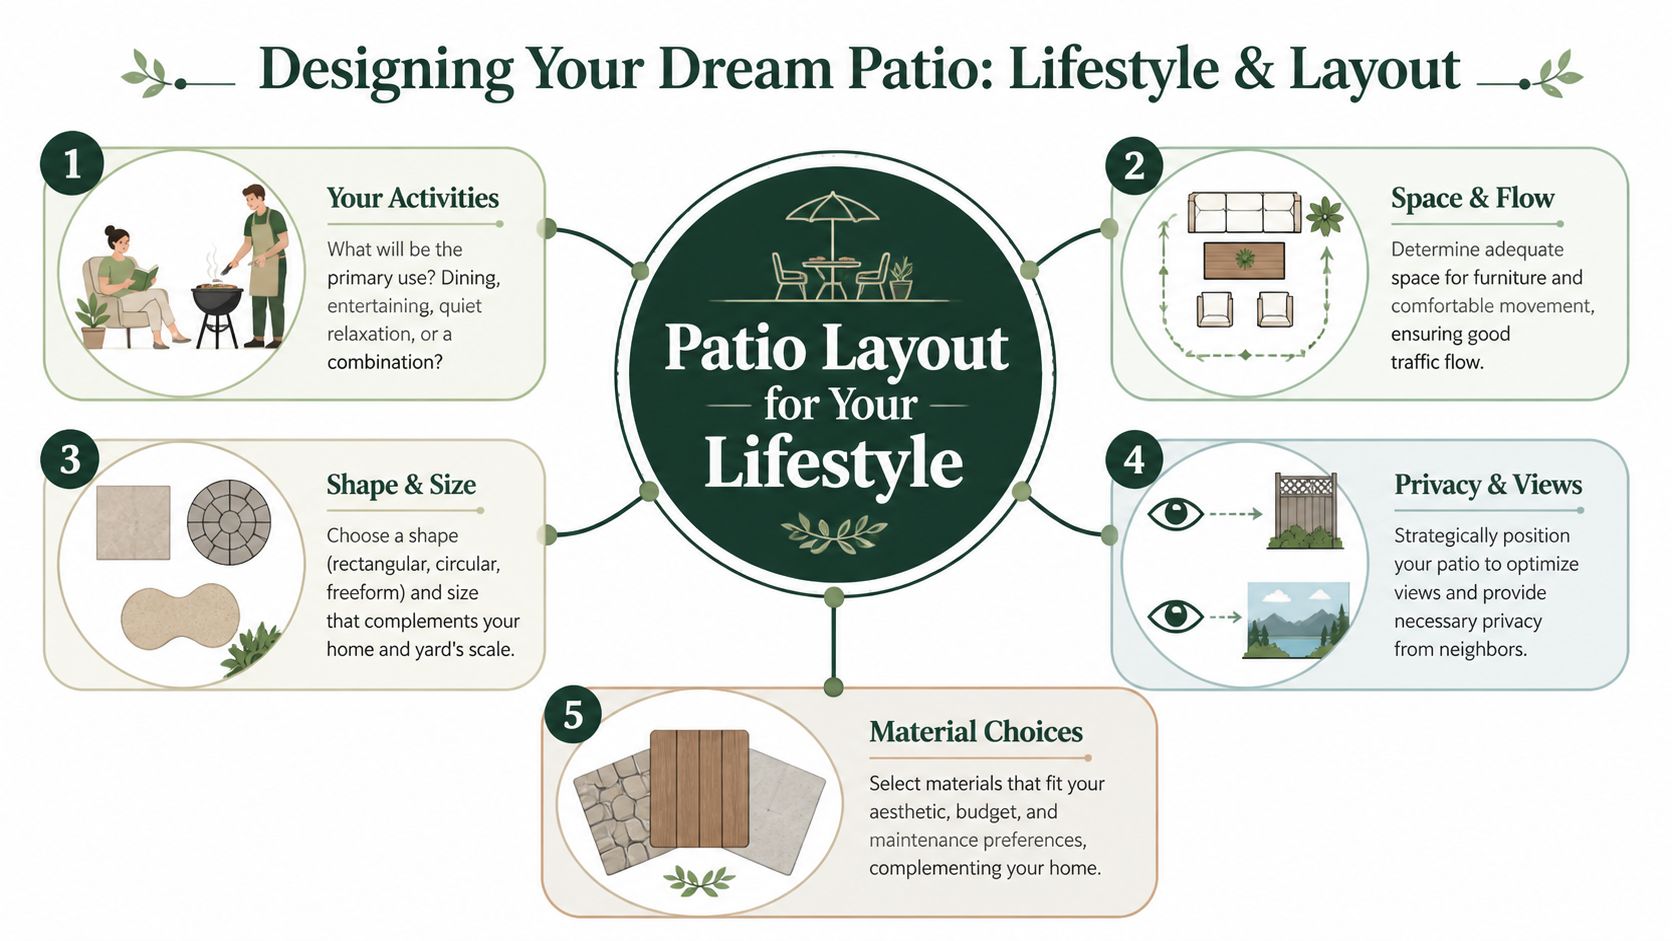
Good patio layout starts with use, not square footage alone. Homeowners usually regret patios that are undersized for dining and circulation, or oversized patios that consume too much usable yard and increase cost, runoff, and maintenance. The right footprint has to fit the house, the lot, and how the space will be used on a normal week, not just on holidays.
A few sizing benchmarks help. A 12×12 foot patio, or 144 square feet, is a comfortable minimum for six-person dining, while outdoor living layouts with separate dining, lounging, and cooking zones often reach 300 to 400+ square feet, based on Angi’s patio size guide. Those numbers are only a starting point. On the Central Coast, access, grade changes, and drainage often matter more than the raw square footage.
Match the patio to how you’ll actually use it
I plan patios around routines first. Coffee in the morning. Weeknight dinner outside. A place to stand near the grill without blocking the slider. That approach usually produces a better layout than starting with a big empty rectangle and hoping furniture solves it later.
A compact patio can work well for a bistro table and two chairs. A family patio needs enough clearance for dining chairs, walking space, and at least one route that does not cut through the seating area. If a cover, outdoor kitchen, or fire feature may be added later, the layout should reserve space now. Retrofitting those features after installation usually forces awkward cuts, poor circulation, or unnecessary demolition.
Use these checks while laying out the footprint:
- Dining area: Leave enough room for chairs to pull out and for someone to walk behind them.
- Seating zone: Place it where people can gather without becoming the main path across the yard.
- Cooking area: Keep it convenient to the house, but clear of door swings and tight corners.
- Open circulation: Hold back some empty space so the patio feels usable once furniture, planters, and storage pieces are in place.
One rule that helps is simple. Keep a meaningful share of the surface open for movement. A patio that looks generous on paper can feel cramped as soon as real furniture shows up.
Shape matters on Central Coast lots
Rectangles are easy to build and easy to furnish, but they are not always the most efficient choice. In older Monterey, Pacific Grove, and Salinas neighborhoods, rear yards often taper, side setbacks tighten up quickly, and grade changes break up the usable area.
On those sites, an L-shape, a clipped corner, or a two-level layout often works better than one oversized pad. That is not a style decision alone. It can improve circulation, reduce excavation, and limit how much grading has to happen near foundations or existing trees. In seismic country, simpler retaining and grading solutions are often the safer call than forcing a large flat platform where the site does not want one.
For homeowners considering overhead cover, this overview of custom covered patio designs is useful because a roof structure changes post locations, furniture placement, and traffic flow under the patio.
California patio planning has to account for more than furniture
In California, layout choices often affect compliance. Drainage cannot direct water toward the house. Permeable areas still matter. If the project includes planting changes or irrigation updates, water-use rules under MWELO can affect how the surrounding yard is organized and where new planting zones belong.
That is why I treat the patio as part of the whole yard plan, especially on Central Coast properties where drought limits, winter runoff, salt air, and sloped lots all influence the final layout. A patio may need to coordinate with drains, low-water planting, irrigation rerouting, retaining work, and access paths at the same time. Homeowners who want the space to function well every day should review outdoor layouts built for daily use before locking in the final footprint.
Selecting Durable and Stylish Patio Materials
Material choice gets most of the attention, but surface appearance is only part of the job. A patio has to suit the house, hold up in the local climate, and be installed on a base that won’t move.
What works well and where the trade-offs are
Pavers are usually the most flexible option for custom layouts and future repairs. Natural stone gives a stronger architectural look but needs a clear plan so it doesn’t feel random or overly busy. Poured concrete can work when the design is clean and the finish fits the property, but it leaves less room for spot repairs if movement shows up later.
The table below keeps the comparison practical.
| Material | Typical Cost | Durability | Maintenance Level |
|---|---|---|---|
| Concrete pavers | Varies by layout, access, and finish | High when base prep is correct | Moderate |
| Natural stone | Usually higher than standard pavers | High | Moderate |
| Poured concrete | Often selected for simpler layouts | Good, but surface cracking is harder to address | Low to moderate |
Cost depends on size, access, grading, edge details, and site conditions, so exact pricing belongs in an estimate rather than a generic article.
Coastal conditions change the material decision
On the Monterey Bay side of the county, moisture, salt air, and shade can all influence surface performance and appearance. Some finishes show staining or discoloration faster. Some textures stay safer underfoot in damp conditions. Some patterns look sharp on day one but become harder to keep clean around planting beds or tree litter.
That’s why the material discussion should include maintenance reality, not just color and style. If you want a crisp modern patio but don’t want frequent upkeep, say that early. It narrows the field fast.
The right material is the one that still makes sense after weather, traffic, drainage, and maintenance are part of the conversation.
The base matters more than the surface
This is the part homeowners rarely see and the part that decides whether the patio lasts. Professional installation requires excavation to 7 to 9 inches below finished grade with a 4 to 6 inch compacted gravel base installed in 2-inch lifts, according to ShelterLogic’s patio installation guidance. Skipping that staged compaction is identified there as the primary reason patios become uneven and develop trip hazards and drainage problems within a few years.
That means no rushing the excavation, no dumping all base material at once, and no guessing at compaction. In the field, poor base work shows up later as settlement, rocking pavers, low spots, and water holding where it shouldn’t.
If you want a deeper look at why installations fail before the finish material is even set, this breakdown on hardscape failure before pavers go down is worth reading.
Understanding Patio Permits and Drainage Requirements
Permits and drainage aren’t the exciting part of patio planning, but they decide whether the job moves smoothly or turns into a correction project.
Know when the plan crosses into permit territory
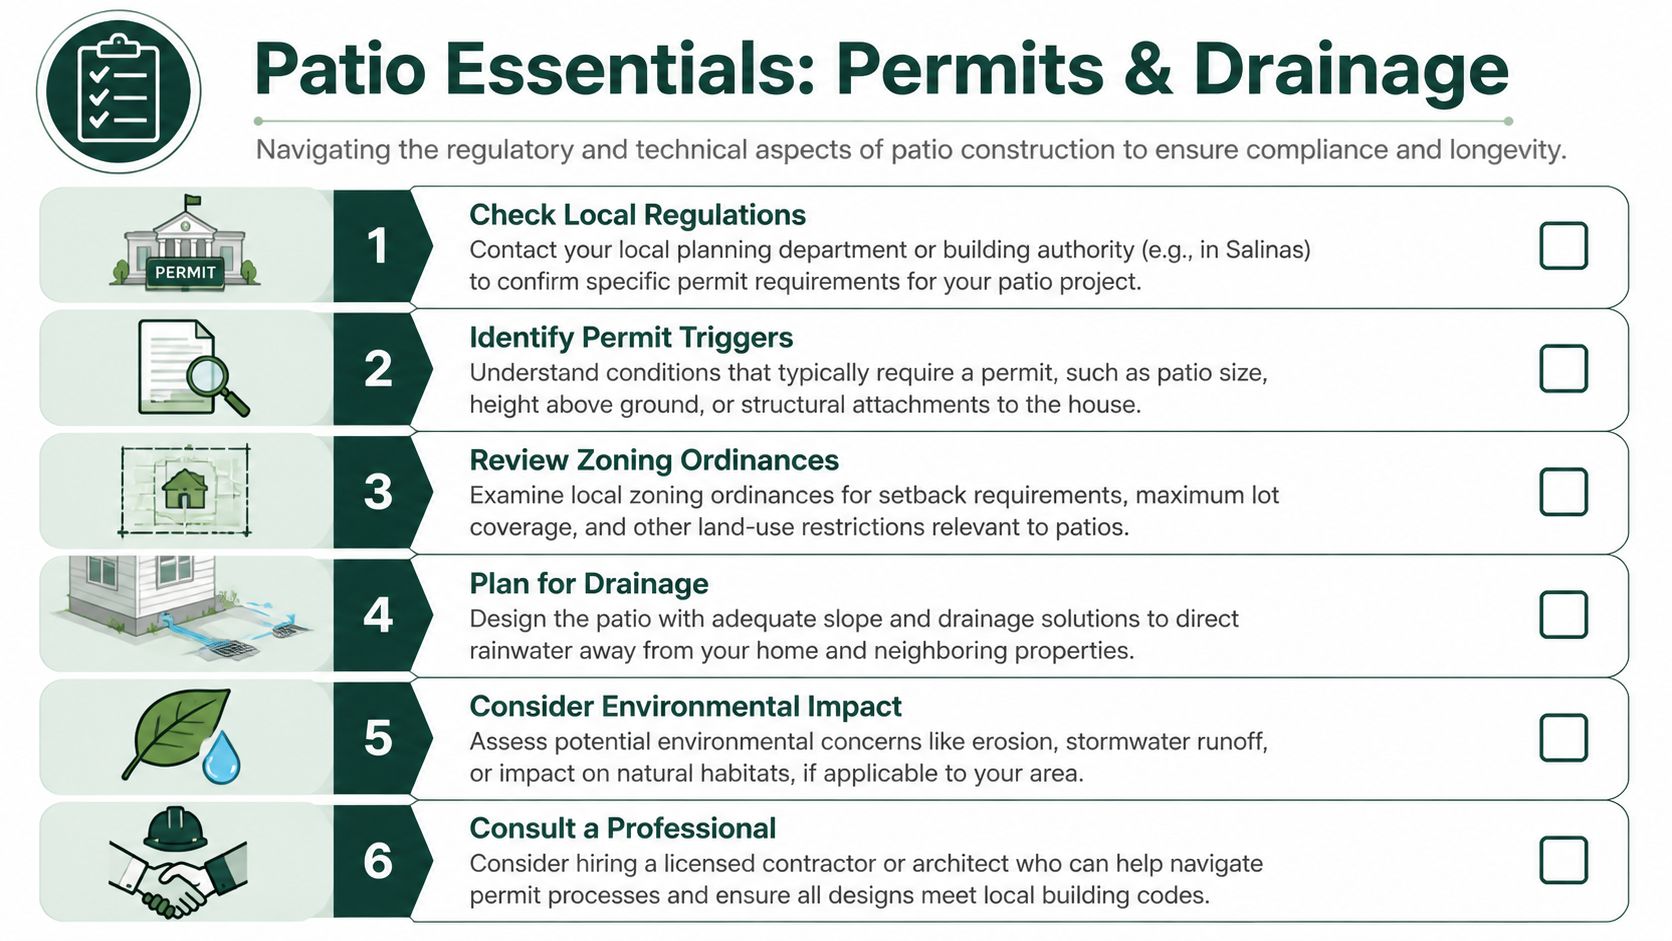
Permit requirements vary by jurisdiction, so the safe approach is to check with the local building department before work starts. In practice, patios can trigger review when they involve retaining work, structural attachment, raised conditions, drainage changes, or slope conditions that affect stability.
That matters in Salinas and across Monterey County because a patio often ties into more than just a flat finished surface. Add a retaining wall, steps, footings, drainage infrastructure, or a cover, and the review path may change.
If the site is sloped or near grade transitions, structural review becomes more important. That’s also where local knowledge helps. A contractor familiar with the region can identify likely code questions before the design is finalized.
Drainage is not optional
Every patio needs a drainage plan. Water has to move away from the house, away from door thresholds, and away from any spot where runoff will create erosion or nuisance flow.
Common drainage failures include patios set too high against the house, flat surfaces that hold water, and edge conditions that dump runoff into planting beds with nowhere to go. Those mistakes don’t just shorten patio life. They can affect foundations, adjacent outdoor areas, and lower parts of the yard.
A good plan accounts for:
- Surface slope: Water should be directed away from structures.
- Collection points: Drains may be needed where grade limits runoff options.
- Adjacent soil: Beds next to the patio need to handle overflow without washing out.
- Downspouts: Roof water can’t be ignored just because a patio is new.
Water always wins if the plan doesn’t give it a path.
California adds water and seismic requirements
Generic online patio plans often fall short. In California, patio plans often need to account for the Model Water Efficient Ordinance, which requires significant water-use reduction, and in many Bay Area and Central Coast locations, seismic codes may require reinforced footings for stability during earth movement, as noted by My Patio Design’s California patio planning discussion.
For a Central Coast property, that can affect surface selection, drainage strategy, adjacent planting, and how any structural patio elements are designed. Permeable surfaces may be worth considering where runoff is a concern, but they still need proper support and site-specific detailing. Water-wise planting and irrigation updates should also be coordinated with the patio so the hardscape doesn’t create wasteful spray patterns or dead zones.
Partnering with a Professional for Your Patio Project
A patio can look straightforward on paper. Then the crew starts work and finds tight access, inconsistent grade, old irrigation lines, or soil that will not support the section thickness the finish material needs. On the Central Coast, I also look at salt air exposure, winter drainage patterns, and whether nearby structures or seat walls raise permit and footing questions.
 landscape designer and a homeowner reviewing detailed blueprints for a new backyard patio project together.” />
That is why contractor selection affects the result as much as the material choice. A clean paver pattern or a nice concrete finish will not save a project that was priced without enough excavation, base work, drainage planning, or code review.
What a professional process should look like
A good contractor follows a clear sequence.
Consultation starts with an on-site review. The goal is to confirm how the space will be used and identify field conditions that change the plan, including access for equipment, finished floor elevations at doors, existing utilities, runoff paths, and planting or irrigation areas that may need to be updated to stay aligned with MWELO goals.
Design turns that information into a buildable plan. In Monterey County, that often means balancing appearance with practical concerns such as slip resistance in coastal moisture, surface temperature in full sun, and material performance near the bay where damp air and salt can be hard on some finishes.
Review is where decisions get tightened up before any demolition starts. This is the point to confirm dimensions, edge details, step locations, jointing, drainage direction, and whether any walls, covers, or raised sections trigger engineering or permit review.
Installation should follow the approved plan, not field guesswork. Base depth, compaction, reinforcement, and drainage details matter more than homeowners expect, especially on sites with expansive soils, older homes, or grade changes that can shift movement into other parts of the yard.
Walkthrough finishes the job properly. The owner should know how water leaves the surface, what normal settling does and does not look like, and what maintenance the chosen finish will require in a coastal California climate.
Why this matters in practice
The projects that go sideways usually do so before the first paver is set. The bid was based on a quick measurement. The slope at the back door was ignored. The material was chosen before anyone checked glare, heat, maintenance, or how the color would look against the house through Monterey fog and summer sun.
Good planning prevents that.
For homeowners comparing bids, this guide to how to choose a custom outdoor contractor near Salinas is useful because it focuses on licensing, process, and project fit.
California Site & Tree Pros uses a five-step process of consultation, design, review, installation, and walkthrough for site development and hardscape work in Monterey County. For plans for a patio, that structure keeps layout, drainage, permitting, and finish decisions coordinated from the start.
Frequently Asked Questions About Patio Planning
How big should my patio be for a normal backyard?
Start with use, not square footage. A patio for a small table and two chairs needs a different footprint than one expected to handle dining, a grill, and a lounge area. On Monterey County properties, I also look at wind exposure, door locations, and whether the yard still needs usable planting space after the patio goes in.
Can a patio be built on a sloped yard?
Yes, if the grade is handled correctly. Some Central Coast lots need cut and fill, a retaining wall, or a split-level layout to keep water from running back toward the house. Forcing one large flat pad onto a sloped site often creates drainage problems, awkward steps, and higher construction cost than homeowners expect.
Do I need a permit for a patio in Monterey County?
Sometimes. Permit requirements depend on the city or county, the height of the work, drainage changes, retaining conditions, and whether the project affects setbacks or structures. Coastal and hillside properties can bring more review, so permit questions should be settled before materials are ordered.
What’s the biggest mistake people make with patio planning?
They choose the surface first. A patio succeeds or fails on slope, base preparation, drainage, and layout. In California, water use rules and runoff control can also affect the plan, especially when the patio changes surrounding planting areas that fall under MWELO requirements.
Are pavers better than poured concrete?
Each has strengths. Pavers are easier to repair and usually handle minor ground movement better, which matters in seismic country and on soils that shift with moisture changes. Poured concrete can cost less for simple shapes, but crack control, finish quality, and glare should be considered, especially in bright coastal light.
How much does a new patio usually cost?
Price depends on more than size. Access, excavation, base depth, drainage work, edge restraints, finish selection, and permit-related requirements all affect the total. For homeowners comparing broad cost factors before asking for bids, this Rescreen Rescue outdoor living cost analysis gives a useful general overview. A site visit is still the only reliable way to price a real project.
How long does patio construction take?
That depends on the site and the scope. A basic patio with good access moves faster than a project that includes drainage correction, irrigation changes, retaining work, or permit review. Monterey Bay weather usually allows steady progress, but coastal moisture can affect scheduling for excavation, base prep, and some finishes.
Can you combine patio work with drainage and irrigation upgrades?
Yes, and it often makes sense. If the patio changes runoff patterns or cuts through existing irrigation, those items should be handled in the same scope so the yard works as one system. That approach also helps avoid rework when nearby planting areas need to meet California water-efficiency rules.
If your back door sits too low, your yard falls away in two directions, or you are trying to choose between pavers, concrete, or natural stone for a coastal property, get the site evaluated before you commit to a design. California Site & Tree Pros handles patio planning in Monterey County with attention to drainage, code requirements, material performance, and how the space will be used. Call (831) 998-7964 in Salinas or (831) 905-8018 in Monterey, or visit 1184 Monroe St., Suite 6, Salinas, CA 93906.